|
Spiral Turning
Spiral turning is a subject that has received very little attention by most schools in which wood turning is taught. Spiral work is seen in antique furniture and also in the modern furniture of the present day. It seems that it takes the wheel of fashion about a century to make a complete turn, for what our forefathers neglected and cherish.
Spiral work gives excellent practice in shaping and modeling wood. It brings into play the principle of the helix as used in cutting threads, etc. ; and its form, size and shape may be varied according to the taste of the individual. As in threads so in spiral work we have single and double spirals, and their form and proportion depend upon their use and application in furniture making. A variation of the spiral may be made in several ways: First, by changing the number of turns of the spiral on a straight shaft; second, by running a spiral on a tapered shaft; third, by changing the shape or form of the spiral itself; and fourth, by making more than one spiral on a shaft. It is uncommon to see ten or twelve spirals running around a single shaft.
Some of the forms of the above types are fully taken up and explained in the work that is to follow.
SINGLE SPIRAL. STRAIGHT SHAFT
 To work out a single spiral for a pedestal proceed as follows: To work out a single spiral for a pedestal proceed as follows:
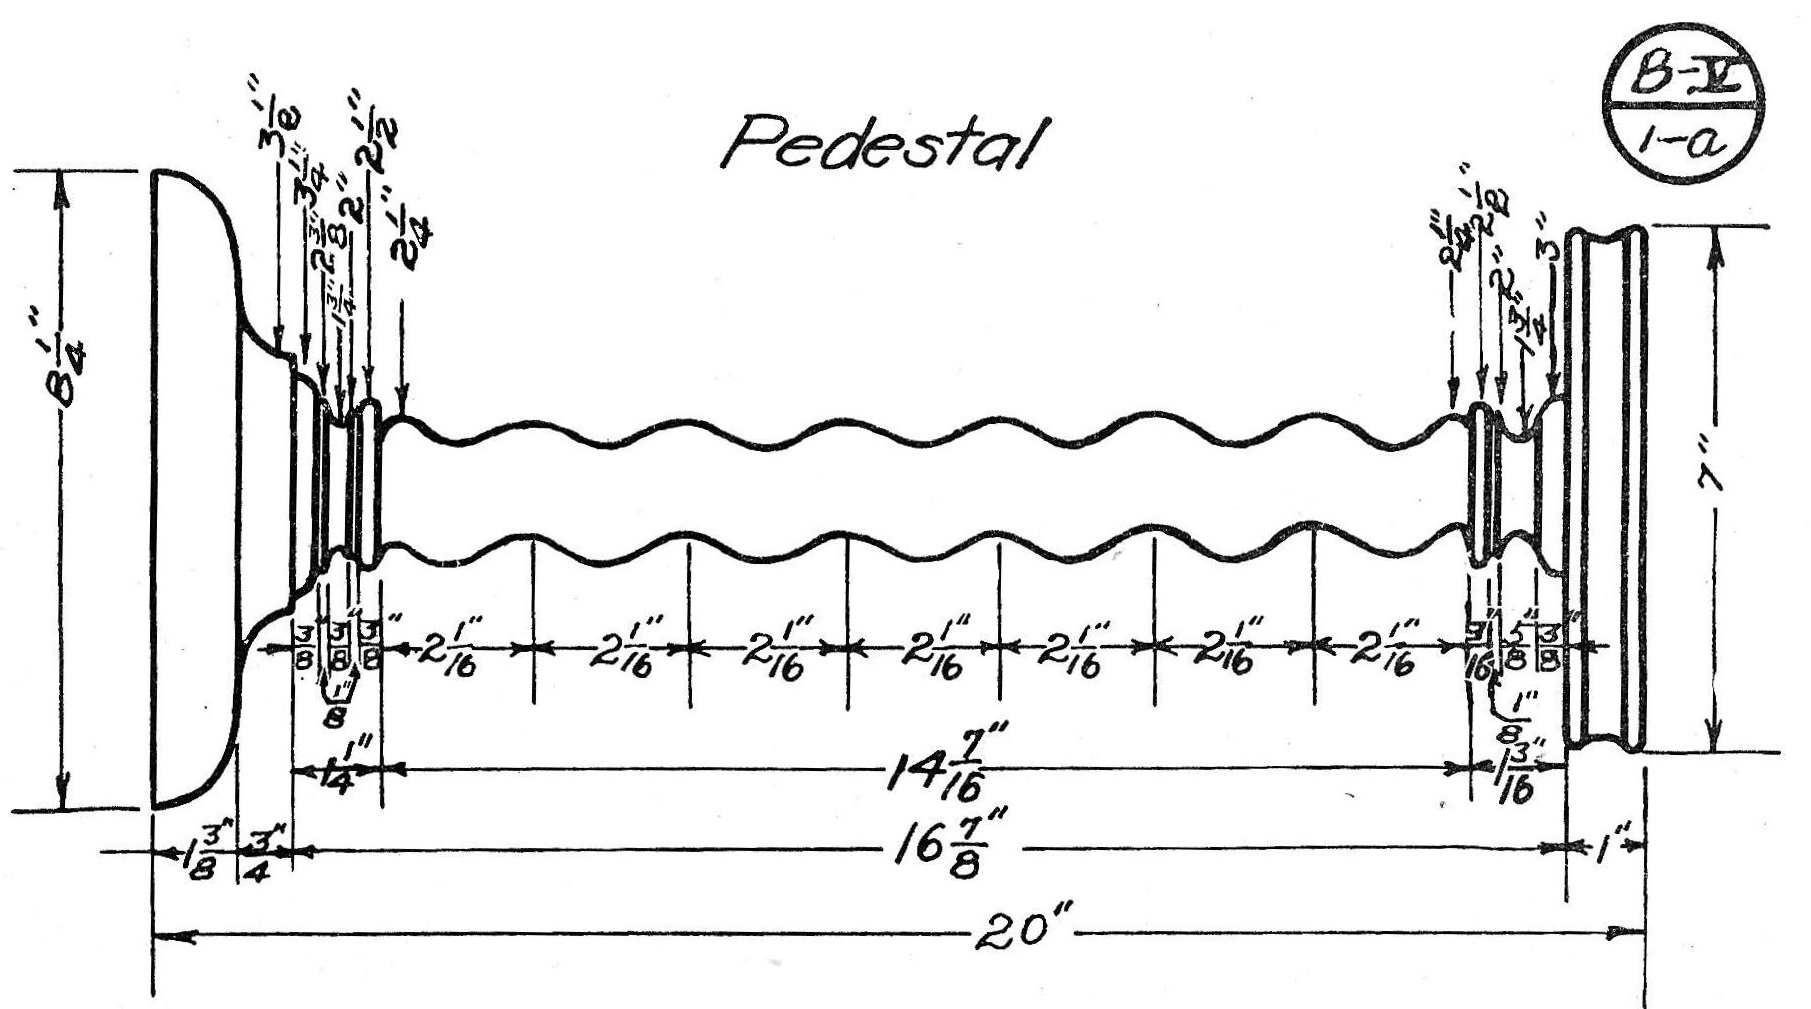
1. Turn a cylinder 2¼” in diameter. Make the ends slightly larger in order that the design may be turned on each, after the spiral has been worked out.
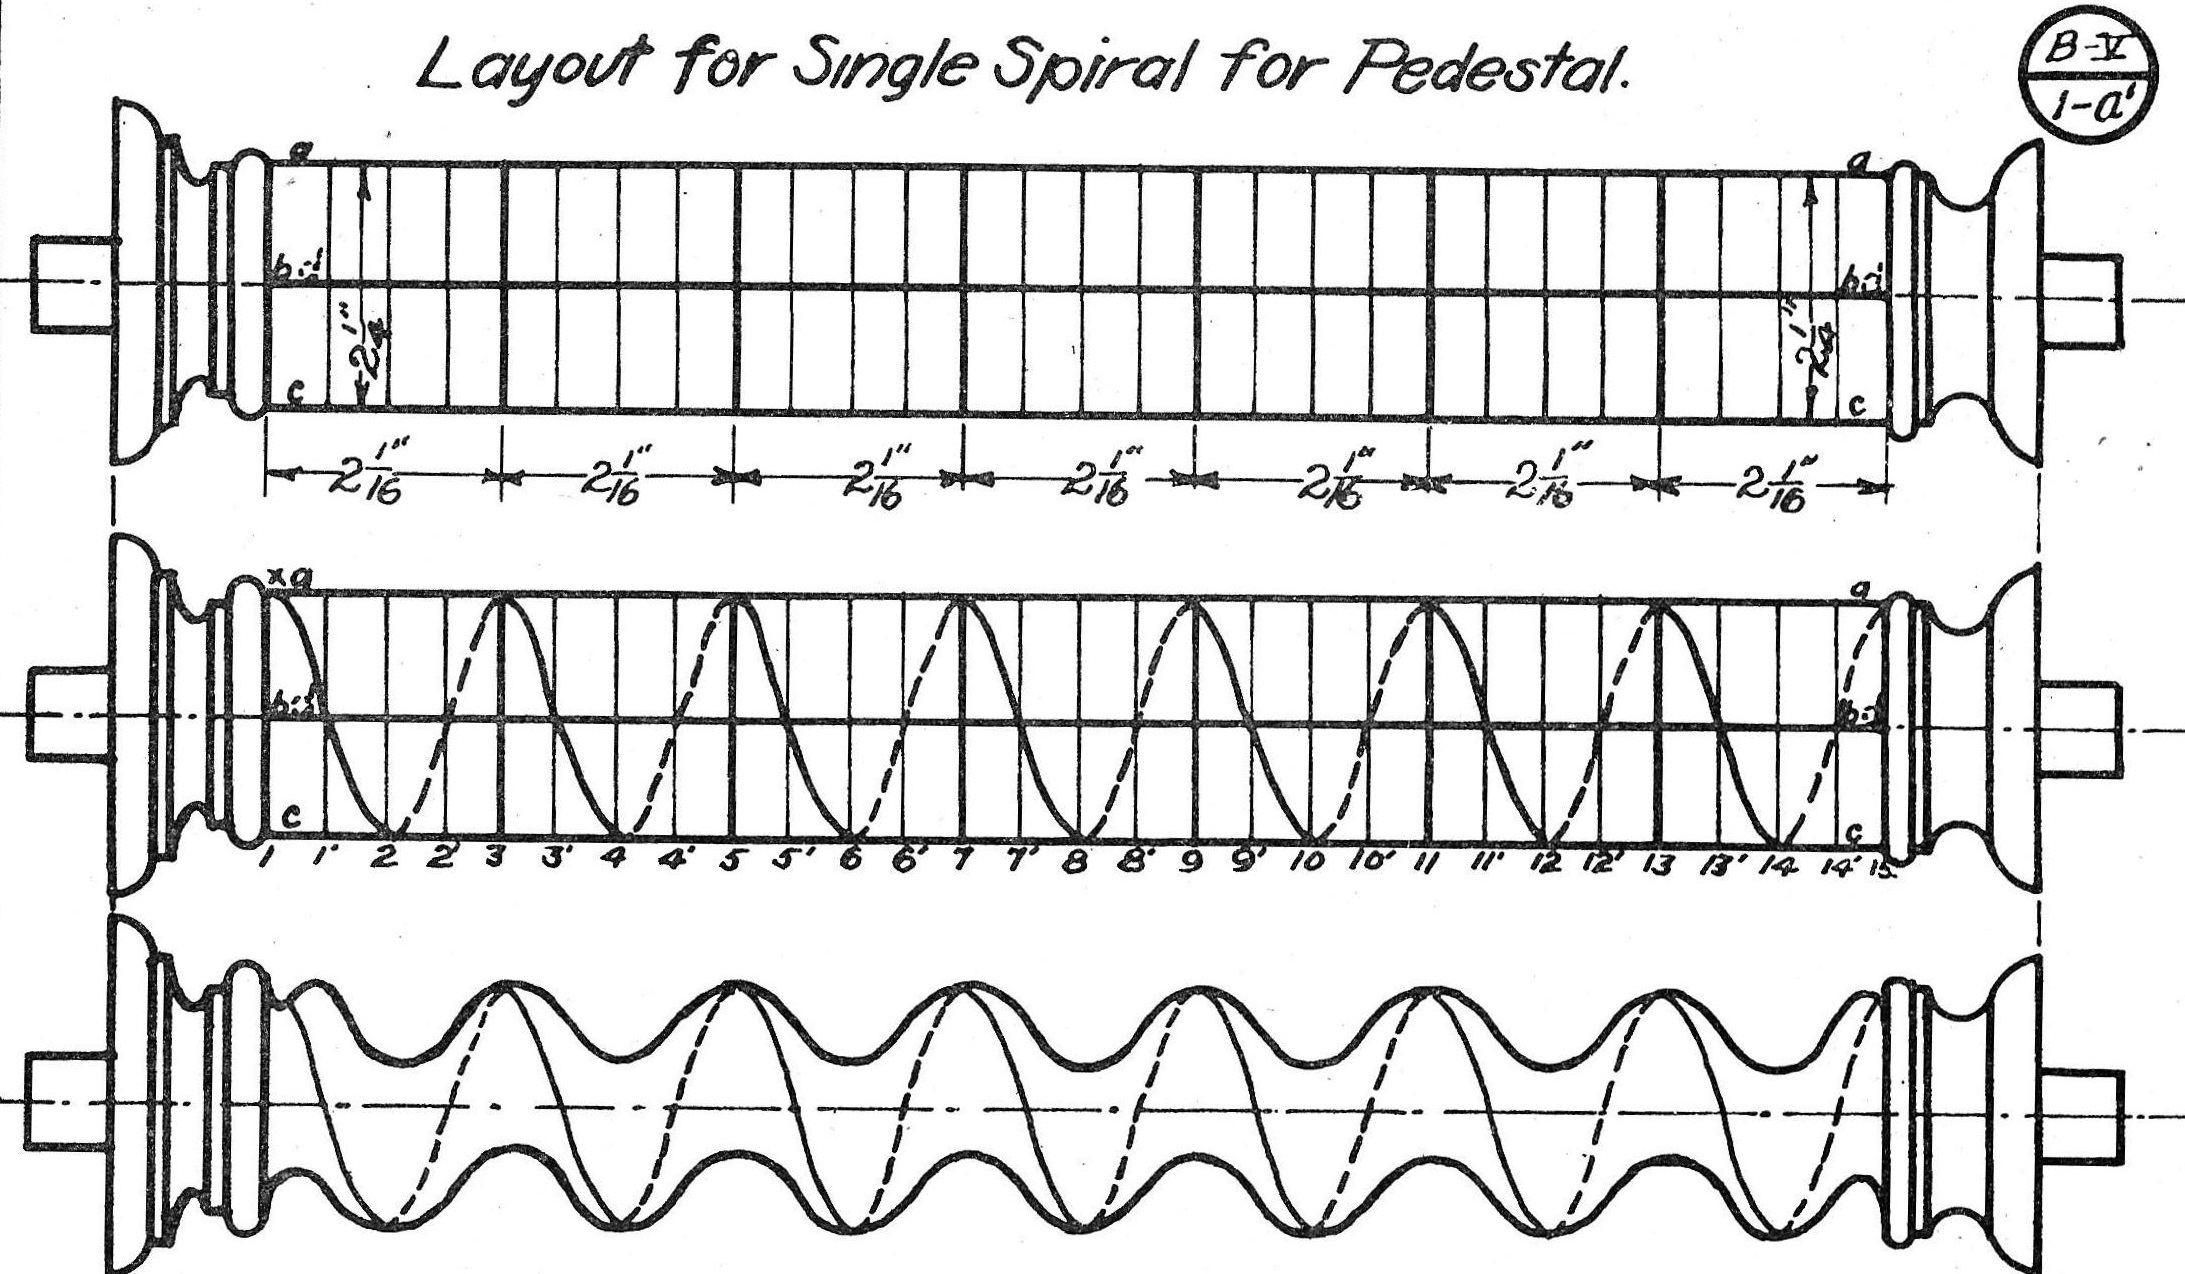
2. Lay off spaces 2-1/16" apart on the cylinder while the spindle is turning in the lathe and divide each of these into four equal parts. Each one of these large spaces represents one turn of the spiral. A good proportion is slightly less than the diameter of the cylinder; this the diameter of the cylinder equals 2¼” and the width of the space 2-1/16”.
|
 |
3. On the cylinder parallel to the axis draw lines A-A B-B C-C D-D. These lines should be 90° apart as shown in the top diagram (Plate B-V-1-a’).
Line D-D is on the other side of the cylinder as shown in the top and middle diagrams
4. Start on line A-A at point X, circle 1, and draw a line connecting it with line B-B on circle 1’. Then connect B-B on circle 1’ with C-C on circle 2 and so on until a spiral has been drawn the entire length of the cylinder. This line will form the ridge of the spiral as shown in the middle diagram.
5. Next begin on line C-C at circle 1, and draw a line connecting it with D-D on circle 1’ then to line A-A on circle 2, and so on as before. This spiral represents the center of the groove or the portion which is to be cut away. This is not shown in the diagram because more or less confusion would be caused with the line representing the ridge of the spiral.
6. Begin on line C-C at circle 1, and saw to a depth of ¾”. Saw the entire length of the cylinder leaving about 1½” at the ends. Do not follow the line here, but switch off gradually and follow circles 1 and 15, so as to allow the spiral to begin and end gradually and not abruptly.
7. Rough out with a knife or chisel by cutting on both sides of the saw cut. Then use a wood rasp to finish shaping out the spiral. When properly shaped out allow the lathe to turn slowly and smooth with sandpaper by following the spiral as the lathe turns.
8. Cut the design on both ends of the cylinder and polish.
|


