| TheWoodcrafter.net |
 Copyright © 2004. |
| My Basic Projects |
| The Retro Section |
| Jr. Woodcrafter |
| My Work |
| Detailed Plans |
| About |
| Lathe Work |
| Safety |
| Hints |
| Pic Gallery |
| Links |
| Search |
| Home |
| Birdhouses |
| Guest Book |
| Contact Us |
|
|
||||||||
|
|
|
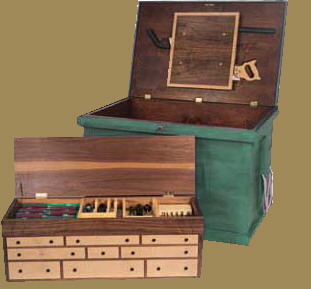
| Benjamin Seaton's Tool Chest | |
| This is the 18th century English
tool chest now in the Guildhall Museum in
Rochester, England. Most interesting is that
unlike other tool chests of its day, this chest
and its tools are virtually unused and are in the
same condition as when they were new in 1796! Benjamin, born in 1775, was the son of a cabinetmaker and church elder. When he turned 21, his father bought him a complete, and very expensive, set of woodworking tools. Benjamin began building this chest for them on Jan. 1797 and finished April 15. Benjamin died in 1830, and his will describes him as a cabinetmaker, upholsterer, auctioneer and undertaker. His chest remained in his family, with the tools intact, until it was given to the Guildhall Museum in 1910. The large outer case of this tool chest will hold many modern hand-held power tools such as a jigsaw, drill, router, circular saw, belt sander and more (with room to spare). The removable case (called a till) with its lids and drawers holds just about every hand tool a well-equipped shop needs. It's a great, and beautifull, addition to any small shop that's low on both space and cabinets. The complete directions areavailable in a pdf (Adobe Acrobat) file FREE for download (below). |
Detailed
Instructions
***********
WARNING***********
Read my page on safety
before building this item.
| Schedule of Materials: Seaton Tool Chest |
|
|
||||||||||||||||||||||||||||||||||||||||||||||||||||||||||||||||||||||||||||||||||||||||
|
|||||||||||||||||||||||||||||||||||||||||||||||||||||||||||||||||||||||||||||||||||||||||
Construction :
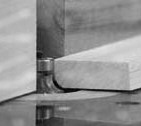
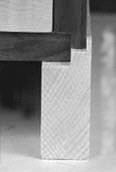
| Finger
Joints Finger joints join the four sides. The moulding is nailed/screwed to the exterior and the lid has a small piece of moulding attached to it that acts as a dust seal. Cut Your
Joints Assemble the case using glue on the finger joints, allowing the bottom to float in its groove. Next, make the moulding by routing a small ogee profile on the bottom moulding pieces. Miter the pieces, then attach them with nails or screws. Dust
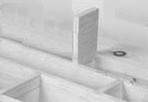
Seal Now make the moulding for the back. This moulding is different because it helps seal the back of the case and acts as a stop for the lid. It's pretty ingenious. Take a piece of moulding back to the table saw and rip off the rabbet. Next, attach this moulding to the back, flush to the top edge of the case. You'll have to cut notches in the moulding for the barrels of the three hinges that hold the lid. Screw and glue this moulding to the back. Now cut the cleats for the sides that hold the rope handles. Use a band saw to cut them to rough shape and sand them down. Then drill a 1/2" hole through the center for the rope. Attach the cleats with screws. If you want to lock to your chest, now is the best time to add a lock. You can use a small full-mortise chest lock. Next, add the dividers for your power tools at the bottom of the case. Fill all your screw holes with water putty and finish sand the exterior of the case to 120 grit. Paint the exterior. Build
the Till The bottom sticks out of the case 3/8", which allows the till to slide on runners in the large case. Till
Details If you've veneered your case, now is the time to add a piece of veneer to the front piece and to cover all the other pine edges that show. Now cut your drawers. Fit your drawers into the till. Finish sand everything and cover the till with two coats of clear finish. Add a chain to the lid to prevent it from opening too far. Build
the Runners |
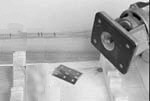
 FINGER JOINT JIG
Saw
Holder Even though the tool chest is made almost entirely of pine, it weighs quite a bit. In fact, when the chest is fully loaded, it takes two strong backs to move it. |

| Click here to download the
directions. These plans are created in Adobe Acrobat Reader (.pdf) files. |