|

|
|
The Woodcrafter Page© 2004 - all rights reserved.
|
|
|
|
|
|
Quilt Rack
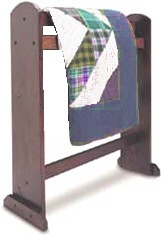
Here is a simple quilt rack you can make in a single day.
Simply add your favorite quilt and you have a nice addition to your room.
| This easy-to-make quilt rack will make a handsome display you can keep for yourself or give it as a gift. The lumber choices include pine, poplar, oak, and a variety of other types you might prefer. Depending on your particular needs, the rack may be painted, stained or have a natural finish. |
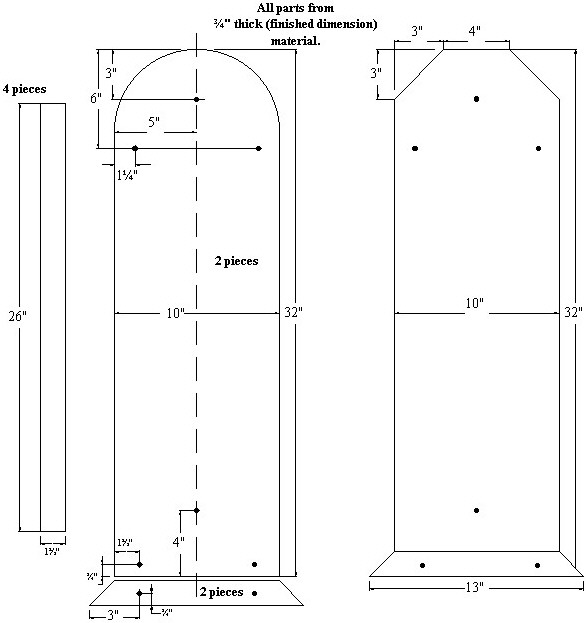 |
This project is made from eight simple parts (plus ten dowel plugs). All parts are from planking (¾" thick finished dimension) stock.
Download, and print, the Adobe Acrobat version of the drawings (left) by clicking here (you might have to right click).
Choose the particular "cut" you want for the top of the stiles (the sides). You can use the rounded-top cut, which will require a band saw, jigsaw or scroll saw, or select the simple "dog-eared" cut.
For a rounded-top stile, mark the piece for the round cut by locating and marking the width center. Make another mark the same distance from the top. Use a compass to scribe the curve from the marked center point.
Cut the eight pieces then locate and drill the ten holes iondicated. Counter sink (recess) each hole to facilitate wooden dowel plugs. |
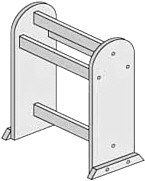 |
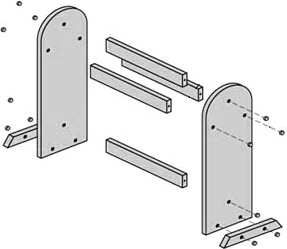
Assembly
Start with the top cross member. Place a screw in the top recessed hole of one of the stiles and turn the screw into the pilot hole until the tip begins to emerge on the other side. Now place one of the cross members against the screw tip, align the pilot hole, and turn the screw into the wood. Repeat for the other stile. Continue until you have put all of the cross members, including the bottom brace, in place. Be sure not to overtighten, so that you can adjust the cross members if needed.
After installing the cross members, attache both "feet." If everything fits together properly and is correctly adjusted, tighten all screws. |
|
 |
|
|
| * * * * Click on the picture above to download a higher resolution picture. * * * * |
*********** WARNING***********
Read my page on safety before building this item.
|
