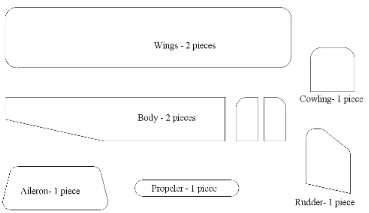
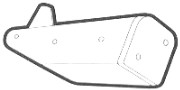
| Start by cutting downloading the scale drawings in the Acrobat file by clicking on the drawing below. Cut all the pieces as indicated in the drawings and predrill all the nail holes with a very small bit.
|
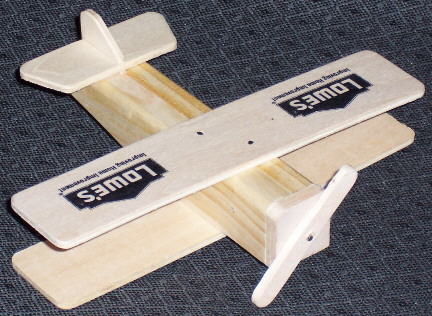
| The Jr Woodcrafter will need the seven wood pieces, the directions, ten (10) ¾" finishing nails, one BRASS ¾" finishing nail, one sheet of 150 grit sandpaper, a really cool workshop apron small enough for kids, and safety goggles. |
| Construction. |
| 1. Locate and pre-nail the right Body side using three ¾" nails in the pre-drilled holes, Attach the left Body side to the right side by finishing nailing the first two nails. |
 |
| 2. Now, locate the Rudder and slide it into the tail end of the assembly. Attach it by nailing the third nail the rest of the way into the pre-drilled hole. |
 |
| 3. Locate the Nose and align the pre-drilled holes with the assembly. Start two ¾" nails on the corner pre-drilled holes and attach it to the assembly by finishing the nailing. |
 |
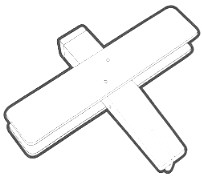
| 4. Locate the top Wing and and attach it to the assembly using two ¾" nails. Repeat these instructions for the bottom Wing. |
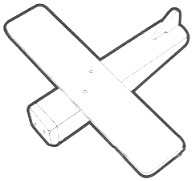 |
| 5. Attach the Propeller to the nose using the Brass nail, Make sure to hammer the Brass nail in only halfway so the Propeller can spin freely. |
 |
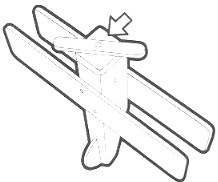
| 6. Slide the Tail Wing into the Tail Rudder.
7. Sand any rough edges to smooth out and complete your Bi-Plane.
|
 |