| TheWoodcrafter.net |
 Copyright © 2004. |
| My Basic Projects |
| The Retro Section |
| Jr. Woodcrafter |
| My Work |
| Detailed Plans |
| About |
| Lathe Work |
| Safety |
| Hints |
| Pic Gallery |
| Links |
| Search |
| Home |
| Birdhouses |
| Guest Book |
| Contact Us |
|
|
||||||||
|
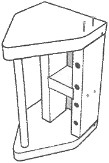
Art Caddy
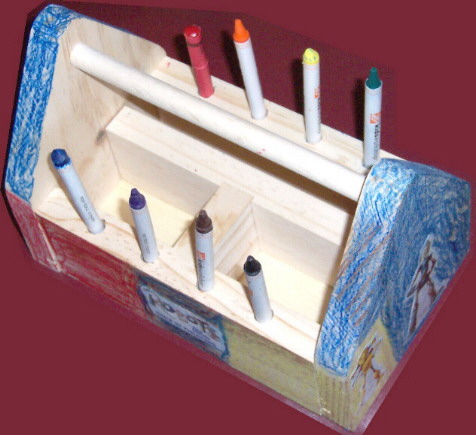 The actual finished item. |
Here's a cool little arts supply caddy project. I suggest you cut out, shape, and drill the pieces to this project then let your Junior Woodcrafter assemble it for a fun project. This simple project can be left unfinished or you can stain or paint it. The Jr, Woodcrafter actually made this item at the April Home Depot children's workshop then added some stick-on decals and colored it with his crayons. |
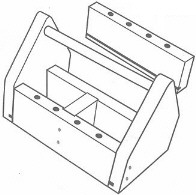
| Start by downloading the scale drawings in the Acrobat file by clicking on the link below. Cut all the pieces as indicated in the drawings, cut out the notches for the bottom and divider parts, drill the holes in the ends for the handle, and predrill all the nail holes with a very small bit. The handel is a ½" diameter dowel, bottom is cut from 1/8" masonite board, and all the remaining parts are cut from ¾" thick pine planking (or stock). |
|
| The Jr Woodcrafter will need the seven (7) project pieces, the directions, fourteen (14) 1½" finishing nails, one sheet of 150 grit sandpaper, a really cool workshop apron small enough for kids, and safety goggles. | |
| Construction. | |
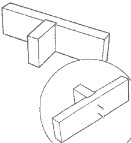
| 1. Start two nails into the center of the middle divider piece on the side opposite the notch. 2. Insert the small divider into the notch in the middle piece and nail it into place. |
 |
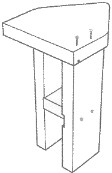
| 3. Start two nails into the center of the right side piece on the side opposite the notch. 4. Insert the small divider, with the middle piece attached, into the notch in the middle piece. 5. Turn the assembly upside-down (crayon holes facing down) so the top edges are held flush then nail it into place. |
 |
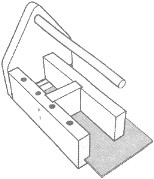
| 6. Start two nails into the end piece with the divider nail holes closer to the left side and into the side opposite the notch. 7. Stand the assembled parts on end and place the end piece in place. 8. Align the bottom corners flush and nail the end on. |
 |
| 9. Slide the bottom into the groove and position the handle into the round hole in the end piece. 10. Start two nails into the remaining end piece into the side opposite the notch. |
 |
| 11. Position the end piece over the end of the assenbly and nail. 12. Align the bottom corners flush and nail the end on. |
 |
| 13. Slide the remaining side into place and nail it in with two nails on each end. 14. Nail the middle piece into place with two nails on each end. 15. Sand any rough edges smooth to complete your Art Caddy. |
 |
| * * * * Click here the picture above to download the drawings as an Adobe Acrobat (pdf) file. * * * * |
*********** WARNING***********