| TheWoodcrafter.net |
 Copyright © 2004. |
| My Basic Projects |
| The Retro Section |
| Jr. Woodcrafter |
| My Work |
| Detailed Plans |
| About |
| Lathe Work |
| Safety |
| Hints |
| Pic Gallery |
| Links |
| Search |
| Home |
| Birdhouses |
| Guest Book |
| Contact Us |
|
|
||||||||
|
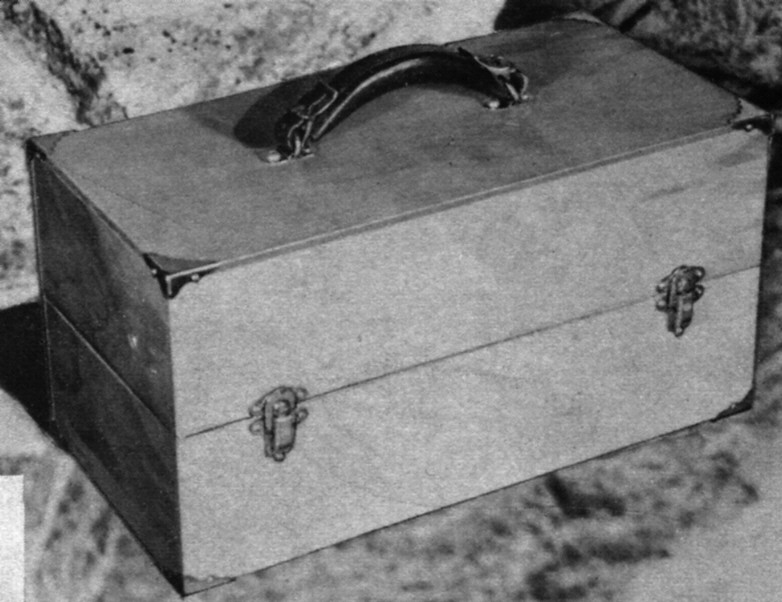
Tackle Box
Here is the orginal article from the
March - April 1959 Deltagram
ROCKWELL MANUFACTURING COMPANY - A DELTACRAFT PULICATION
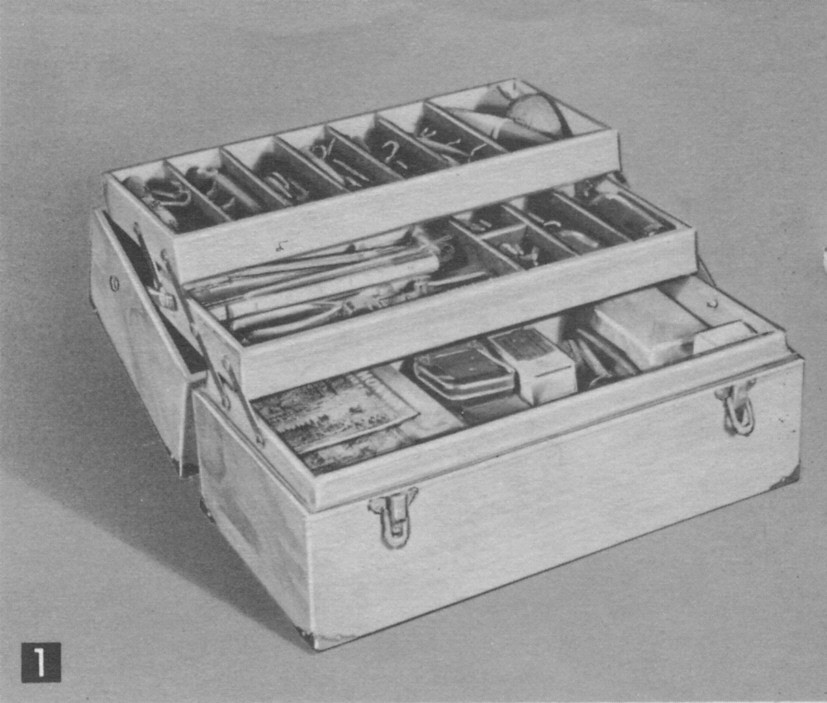
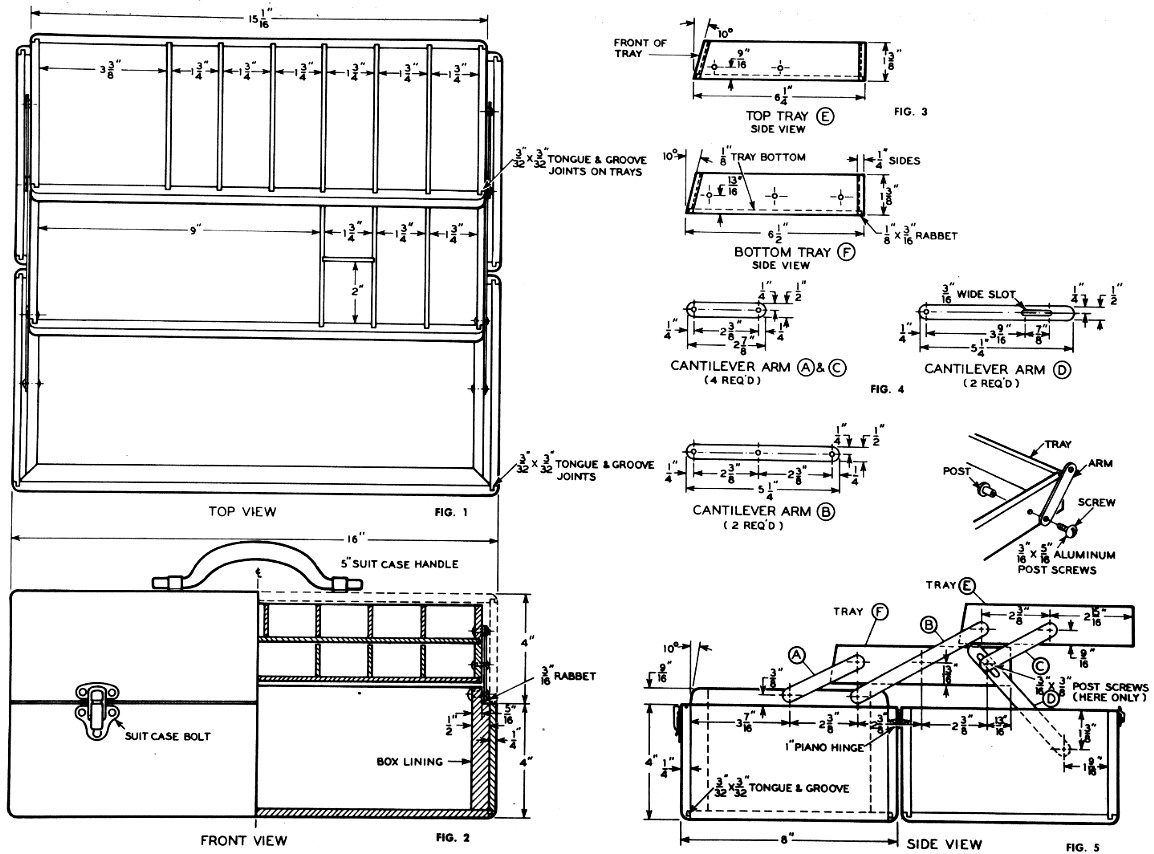
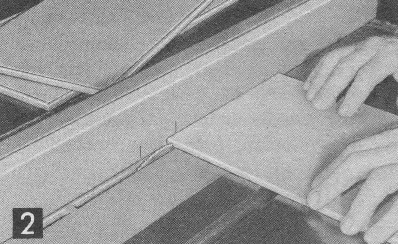
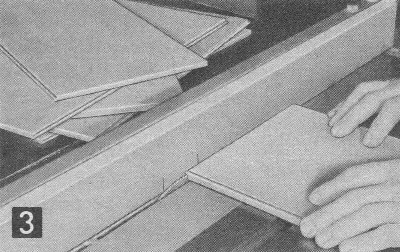
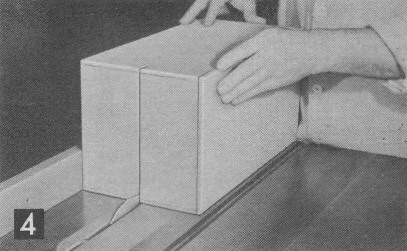
The case and sides of the two trays are made of ¼" birch plywood, good both sides. 3/32x3/32" tongues and grooves are used on the case joints, Figs. 1 and 5. All trimming of the plywood, including the 3/32" grooves, are made on the circular saw with the new Delta plywood circular saw blade Cat. No. 34-707. To assure a perfect fitting box, glue and assemble the box only. Then cut apart the case cover and bottom sections as shown in Photo 4. Box lining is made of ½" stock with mitered corners. A 3/16" rabbet is cut only on the end pieces of the box lining. These rabbets allow clearance space for the cantilever arms, Fig. 2. Before gluing the end lining pieces in place, bore the 3/16" holes for the case pivot points for cantilever arms (A) and (B), see Fig. 5 for hole positions. Note the 10° taper on the front and back of the protruding portion of the front and back box lining pieces, Fig. 5. The side pieces of the trays are assembled with 3/32x3/32" tongue and groove joints. A 1/8"x3/16" rabbet is cut at the bottom of each tray to house a 1/8" thick hardboard bottom piece, Fig. 3. Note that the front on each tray is beveled to clear the case cover when opening and closing the tackle box and that dado grooves are made in the front and back pieces for the partition strips. Also note that the top tray is ¼" narrower than the bottom tray. The compartments in the tray can be varied in width to suit. The partition strips are beveled to conform to the tray ends and are inserted from the bottom into the grooves of the tray front and back sides before fastening the tray bottoms with glue and brads. Make two of each of the cantilever arms (A), (B), (C) and (D) as detailed in Fig. 4 from 16 gage x ½" mild steel. Bore the necessary holes for 3/16" aluminum post screws or hollow rivets. It is very essential that the hole spacings on the cantilever arms, the trays, case lining ends, as well as the case cover be drilled as indicated or the case will not close properly. Before adding the hardware, finish the entire box with one or two coats of wood preservative. When thoroughly dry apply three coats of spar varnish or enamel. To complete, add 8 brass or plastic box corners as indicated in Photo No. 1. A 1" piano or continuous hinge is used on the case. Two 2" suit case bolts keep the case closed. If desired, a suit case lock can be mounted in the center of the box. A leather or plastic handle is used on the case for easy handling.
|
BILL OF MATERIALS
|
| Right-click here to download the plans as an Adobe Acrobat (pdf) file. |
| * * * * Click on the drawings above to download a higher resolution picture. * * * * |
*********** WARNING***********
Read my page on safety before building this item.