| TheWoodcrafter.net |
 Copyright © 2004. |
| My Basic Projects |
| The Retro Section |
| Jr. Woodcrafter |
| My Work |
| Detailed Plans |
| About |
| Lathe Work |
| Safety |
| Hints |
| Pic Gallery |
| Links |
| Search |
| Home |
| Birdhouses |
| Guest Book |
| Contact Us |
|
|
||||||||
|
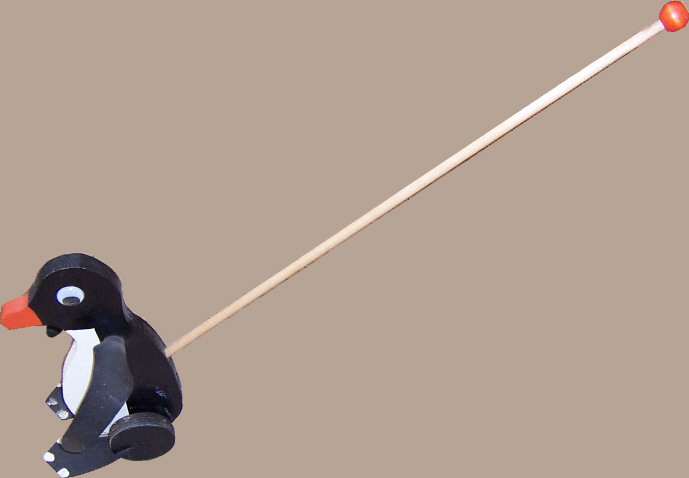 |
Here is an old-fashion
push toy.
The original toy had a simple wooden ball on the end of
the push rod but a 'T' shaped handle affords better
control..
 Penguin Push Toy. 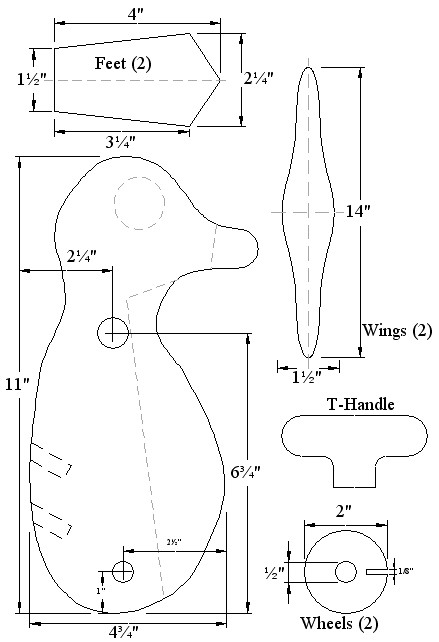 Right-Click on the picture for the drawing. The drawings are full scale drawings. These plans are created in Adobe Acrobat Reader (.pdf) files. |
Detailed
Instructions
***********
WARNING***********
Read my page on safety
before building this item.
Materials needed:
Any choice of woods will work. I used common
dowels and pine planking.
Be sure to use ONLY child safe paints on these iems.
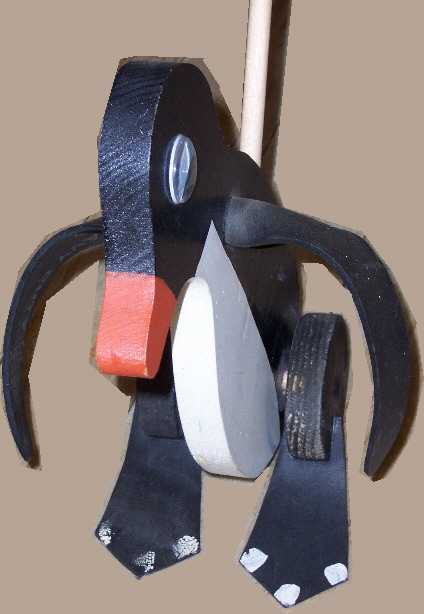
Construction:
This is a pretty simple project. Simply use
the drawing as a guide (or click above for and Adobe pdf
file). Cut out the body and the wheels then locate and
drill the holes for the push rod, the wings, and the
wheel axle. Cut the notch in the wheels for the feet. Cut
the wings and feet from a heavy duty automobile or truck
inner tube. Now, sand all rough edges, paint the wood
(always use child safe paint), glue the wheels on, glue
the feet into the wheels, glue/stick a set of large
'google' eyes on, and pull the wings through the body
hole. Push the push rod (dowel) into one of the holes but
do not glue it. The holes serve as a height adjustment.