| TheWoodcrafter.net |
 Copyright © 2004. |
| My Basic Projects |
| The Retro Section |
| Jr. Woodcrafter |
| My Work |
| Detailed Plans |
| About |
| Lathe Work |
| Safety |
| Hints |
| Pic Gallery |
| Links |
| Search |
| Home |
| Birdhouses |
| Guest Book |
| Contact Us |

|
|
|||||||||
|
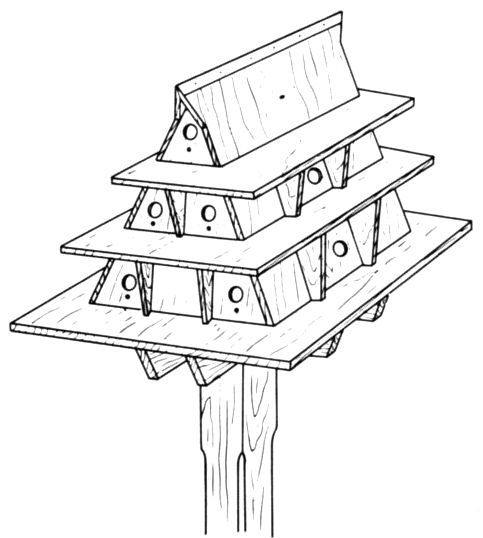
Here is the orginal
article from the
May - June 1957 Deltagram
ROCKWELL
MANUFACTURING COMPANY - A DELTACRAFT PULICATION


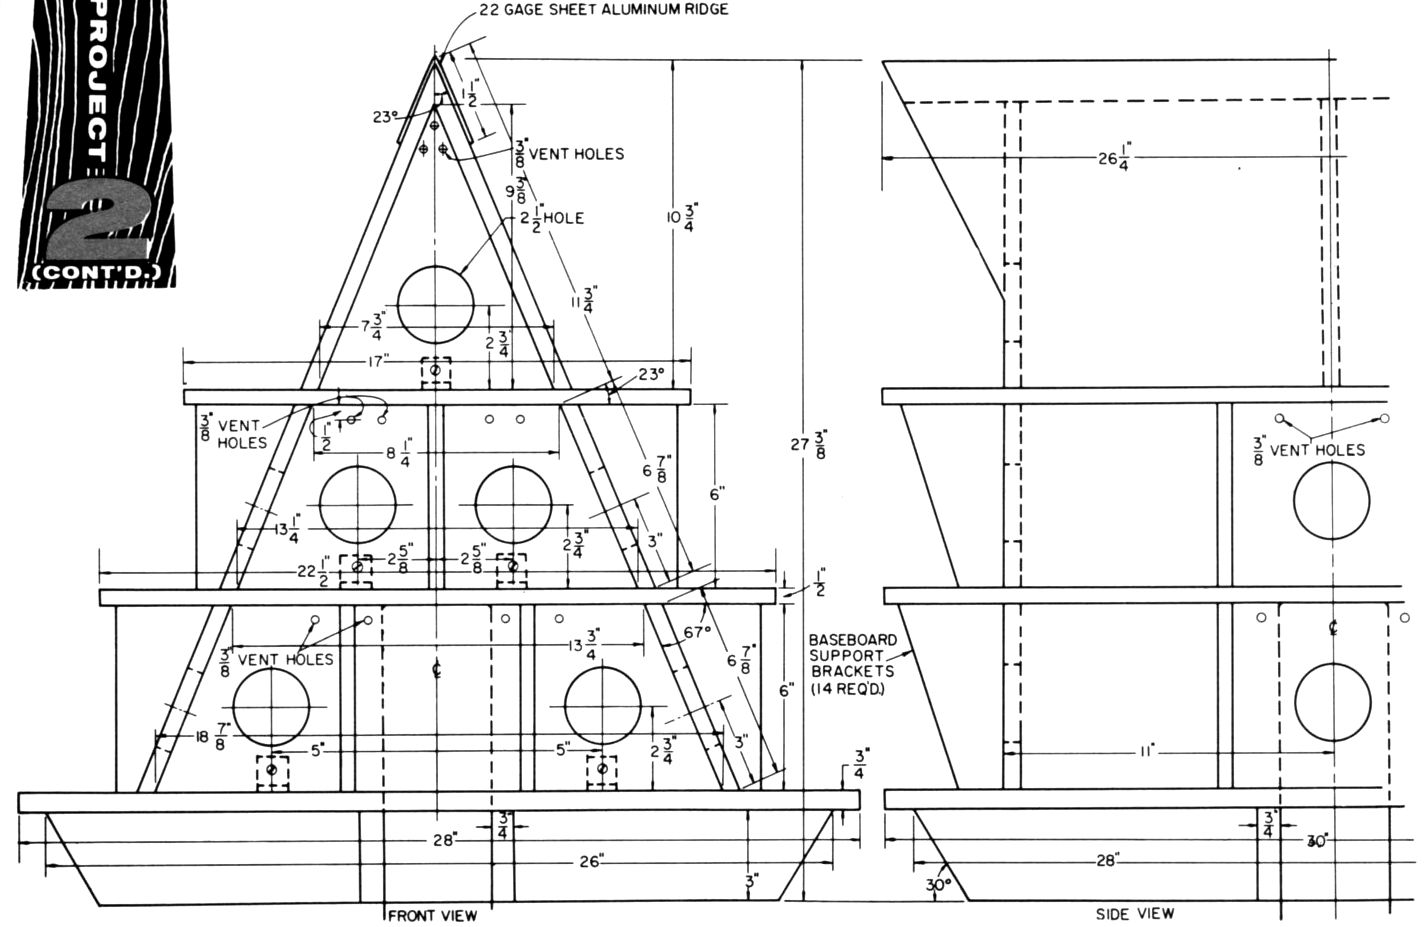
Bill of Materials
# Pieces Name Size 1 8 1 8 4 2 2 2 4 2 1 4 8 1
Right-click here
to download the drawing as an
Adobe Acrobat (pdf) file.


Wooden Nail Keg
Platform Floor
1/2 x 5-7/8 x 15
Base Platform
3/4 x 21 x 21
Platform Support Brackets
1/2 x
3-1/2 x 5-3/4
Roof Support Brackets
1/2 x 3-1/2 x 5
Separator Pieces(Base Section)
1/2 x 5-3/4 x 12-1/8
Separator Pieces(Center Section)
1/2 x 5-3/4 x 12-1/4
Separator Pieces(Top Section)
1/2 x 7 x 12
Roof Boards
1/2 x 7-1/2 x 11-1/2
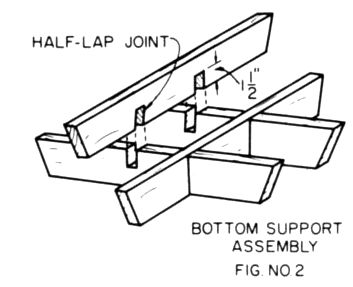
Base Support Cross Pieces
3/4 x 3 x 20
Flange Support
3/4 x 8 x 8
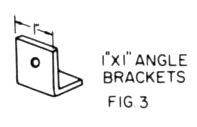
Angle Brackets
1 x 1 x 1
Flat Head Machine Screws (Brass)
10-32 x 3/4
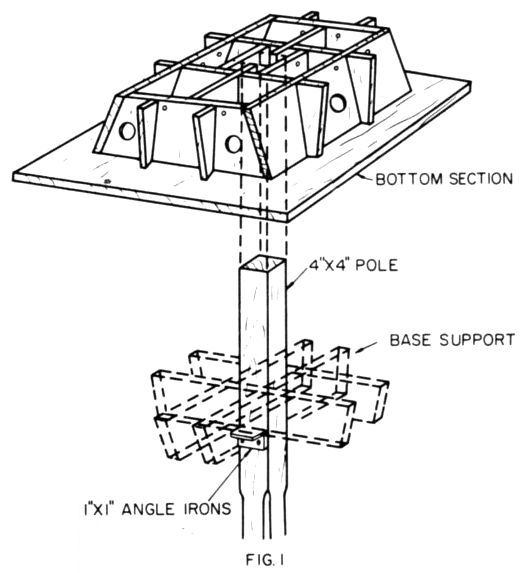
Post
1-1/4 diameter pipe (with flange)
or
4 x 4 x 15 or 20
feet
* * * * Click on the drawings above to download a higher resolution picture. * * * *
*********** WARNING***********
Read my page on safety
before building this item.