|
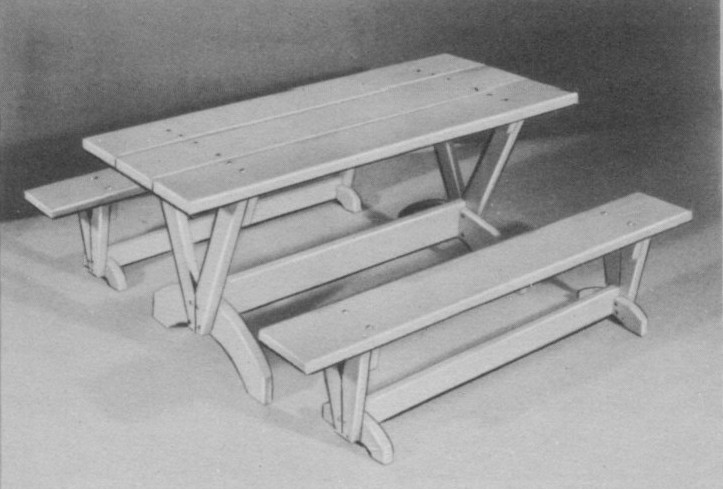
(Photo No. 1)
PINCNIC TABLE
and BENCHES
| |
|
When unexpected company comes during a sunny weekend or holiday you can plan a real picnic right in your own back yard if you own this picnic table set.
With the benches separate from the table you have a picnic table that is more versatile than other types. You can use the benches to do double duty as lawn seats.
The table and benches are bolt fastened with Vs carriage bolts and wood screws so they can be taken apart for Winter storage. They would make excellent pieces for the recreation room for winter use if desired.
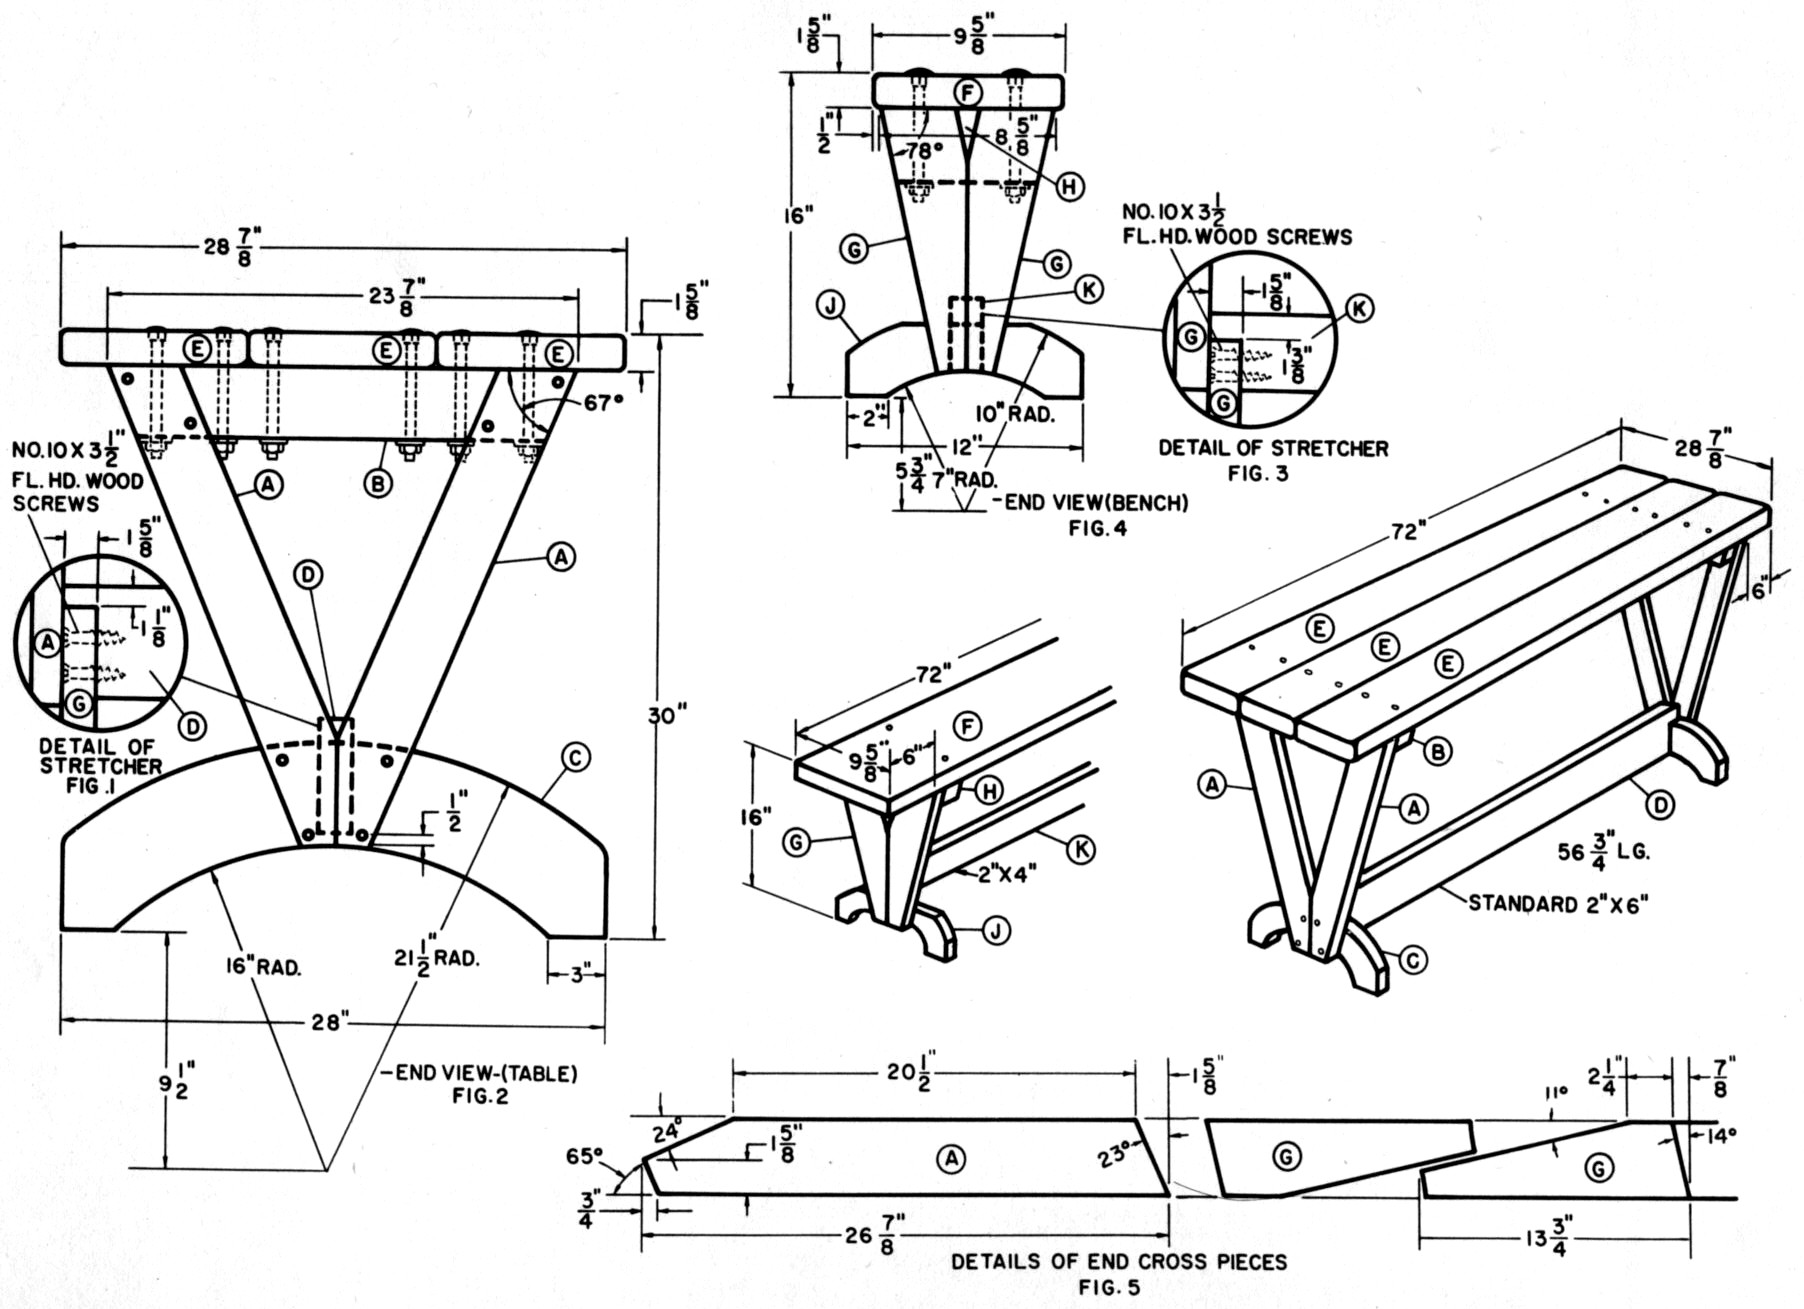
The bottom stretchers on the table and benches are screw fastened to the ends with No. 10 x 4 flat head wood screws as shown in Fig. 3 of the drawing on opposite page.
Both table and benches are made of standard 2 x 4 and 2 x 10 stock. Short benches for the ends could be made by using identical details as in the long ones except the length of the top boards and the bottom stretchers.
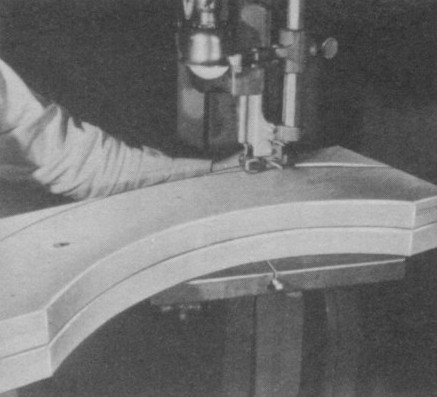
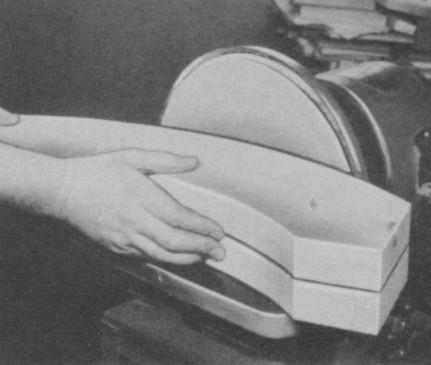
The feet (C) of the uprights on both table and the benches can be cut in pairs by tacking them together as in Photo No. 3. For details see Fig. 2 in the drawing. The curved surface is then sanded smooth on the disk sander (Photo No. 5). |
The tapers on the uprights are cut on the circular saw (Photo No. 2 and Fig. No. 5) with an adjustable tapering jig (featured in November-December —1953 Deltagram). Cut the top cleat (B) and (H) to length at angles shown in Fig. 2 and 4, on your circular saw by setting the miter gage to the proper angle indicated in the drawing. Assemble the leg sections with nails to hold them together for drilling the Vs inch bolt holes on the drill press. Use x 3½ inch long carriage bolts for assembling the leg sections.
The top planks on the table and bench tops are assembled together with Ysx5½ inch long carriage bolts. Place steel washer under the nut of each bolt so that it does not Cut into the wood.
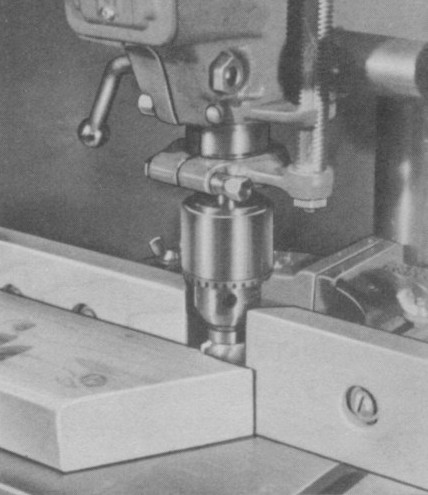
Before assembling any of the parts, break all sharp corners on the drill press using the Cat. No. D-80 shaper cutter.
As a rule, a picnic bench of this type is usually left natural; because it will be used outside it should be preserved with several coats of boiled oil (mixed—half oil and half turpentine) brushed well into the wood. In place of the oil the new wood preservatives can be used. Allow 24 to 48 hours between coats. When the oil or wood preservative is thoroughly dry you can then apply a spar varnish. |
| |
|
Bill of Materials
TABLE BENCHES
No.
of
Pcs. |
|
Name |
Size |
No.
of
Pcs. |
|
Name |
Size |
| 3 |
(E) |
Table Top |
1-5/8 x 9-5/8 x 72 |
2 |
(F) |
Bench Tops |
1-5/8 x 9-5/8 x 72 |
| 4 |
(A) |
Leg Uprights |
1-5/8 x 3-5/8 x 26-7/8 |
8 |
(G) |
Leg Uprights |
1-5/8 x 3-5/8 x 13¾ |
| 2 |
(B) |
Upright Cleats |
1-5/8 3-5/8 23-7/8 |
4 |
(H) |
Upright Cleats |
1-5/8 x3-5/8 x 8-5/8 |
| 2 |
(C) |
Feet |
1-5/8 x 9-5/8 x 28 |
4 |
(J) |
Feet |
1-5/8 x 3-5/8 X 12 |
| 1 |
(D) |
Stretcher. |
1-5/8 x 5-5/8 x 53½ |
2 |
(K) |
Stretchers |
1-5/8 x 3-5/8 x 53½ |
| |
|
|
|
24 |
|
Carriage Bolts
(with Nuts and Washers) |
5/16 x 4 |
| |
|
|
|
20 |
|
Carriage Bolts
(with Nuts and Washers) |
5/16 x 6 |
| |
|
|
|
12 |
|
Flat Head Wood Screws |
No. 12 x 4 |
|
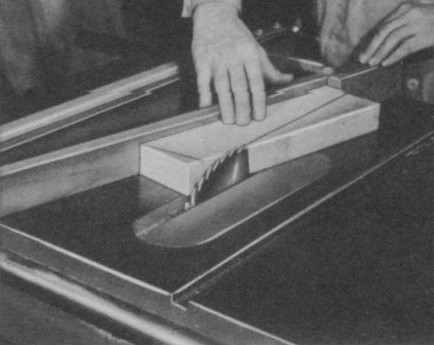
(Photo No. 2)
With the aid of a tapering jig, the uprights are cut on the circular saw.
(Photo No. 3)
By tacking two pieces of stock, the curved
feet can be cut in pairs on the band saw.
(Photo No. 4)
All sharp corner are easily rounded off with the Cat. No D-8
shaper cutter mounted on the adapter for the drill press.
The press should run at the highest speed or about 5000 rpm.
(Photo No. 5)
For smooth curves, the legs are being sanded on the disc sander.
|