| TheWoodcrafter.net |
 Copyright © 2004. |
| My Basic Projects |
| The Retro Section |
| Jr. Woodcrafter |
| My Work |
| Detailed Plans |
| About |
| Lathe Work |
| Safety |
| Hints |
| Pic Gallery |
| Links |
| Search |
| Home |
| Birdhouses |
| Guest Book |
| Contact Us |

|
|
|||||||||
|
Here is the orginal article from the
July- August 1956 Deltagram
|
|
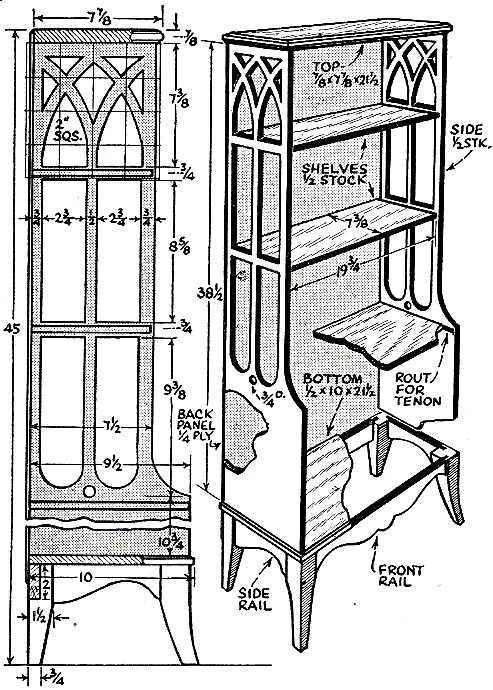
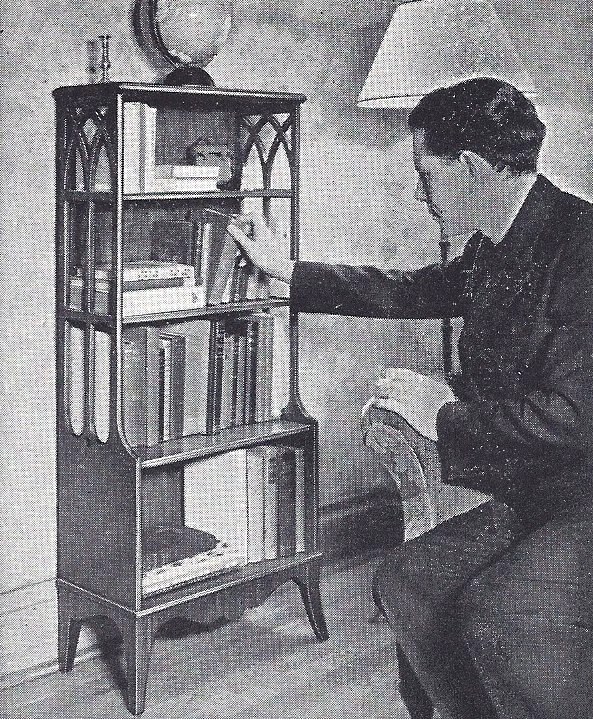
B O O K C A S E
IN HARDWOOD, finished bright, this makes a really attractive piece, yet it offers nothing -especially difficult in the way of construction. Work can be started by making the two side pieces, using the scroll saw for the inside cuts. Stock for the bottom, top, and shelves can then be gotten out and fitted in place. Dowels should ‘be used from the sides into top and bottom, while the three shelves are fastened with the conventional mortise-tenon joint. . The four legs are easily cut out on the band saw. The shape is first laid out on two adjacent sides of the wood stock, as shown in the detail. After making the first band saw cut, the scrap pieces are bradded back in position and the second cut i-s made to complete the leg. The rails are cut out according to the plan, and the assembly of rails and legs is made with mortise-tenon joints. The back rail is simply a straight length of 2 in. wide stock, as can be seen in the plan. The assembly of base to ease proper is made by means of screws inserted from the underside of the rails. The last piece to be fitted is the plywood back. This is not rabbeted in place, as is often the ease, but is simply butted flush against the back, extending down over the back rail, as can be seen in the plan. All edges oi the panel are rounded over in order to give the joint a finished appearance. Doors can be readily added to the lower shelf space if a closed compartment is desired. |


Right-click here to download the drawing as an Adobe Acrobat (pdf) file.
* * * * Click on the drawings above to download a higher resolution picture. * * * *
*********** WARNING***********
Read my page on safety before building this item.