|
|
|
The Woodcrafter Page© 2004 - all rights reserved.
|
|
|
|
Colonial Drop Leaf END TABLE
Here is the original article straight from
Book No. 4505, PRACTICAL DELTA PROJECTS
NEW & NOVEL THINGS TO MAKE, BOOK 5
DELTA MFG. DIVISION
 |
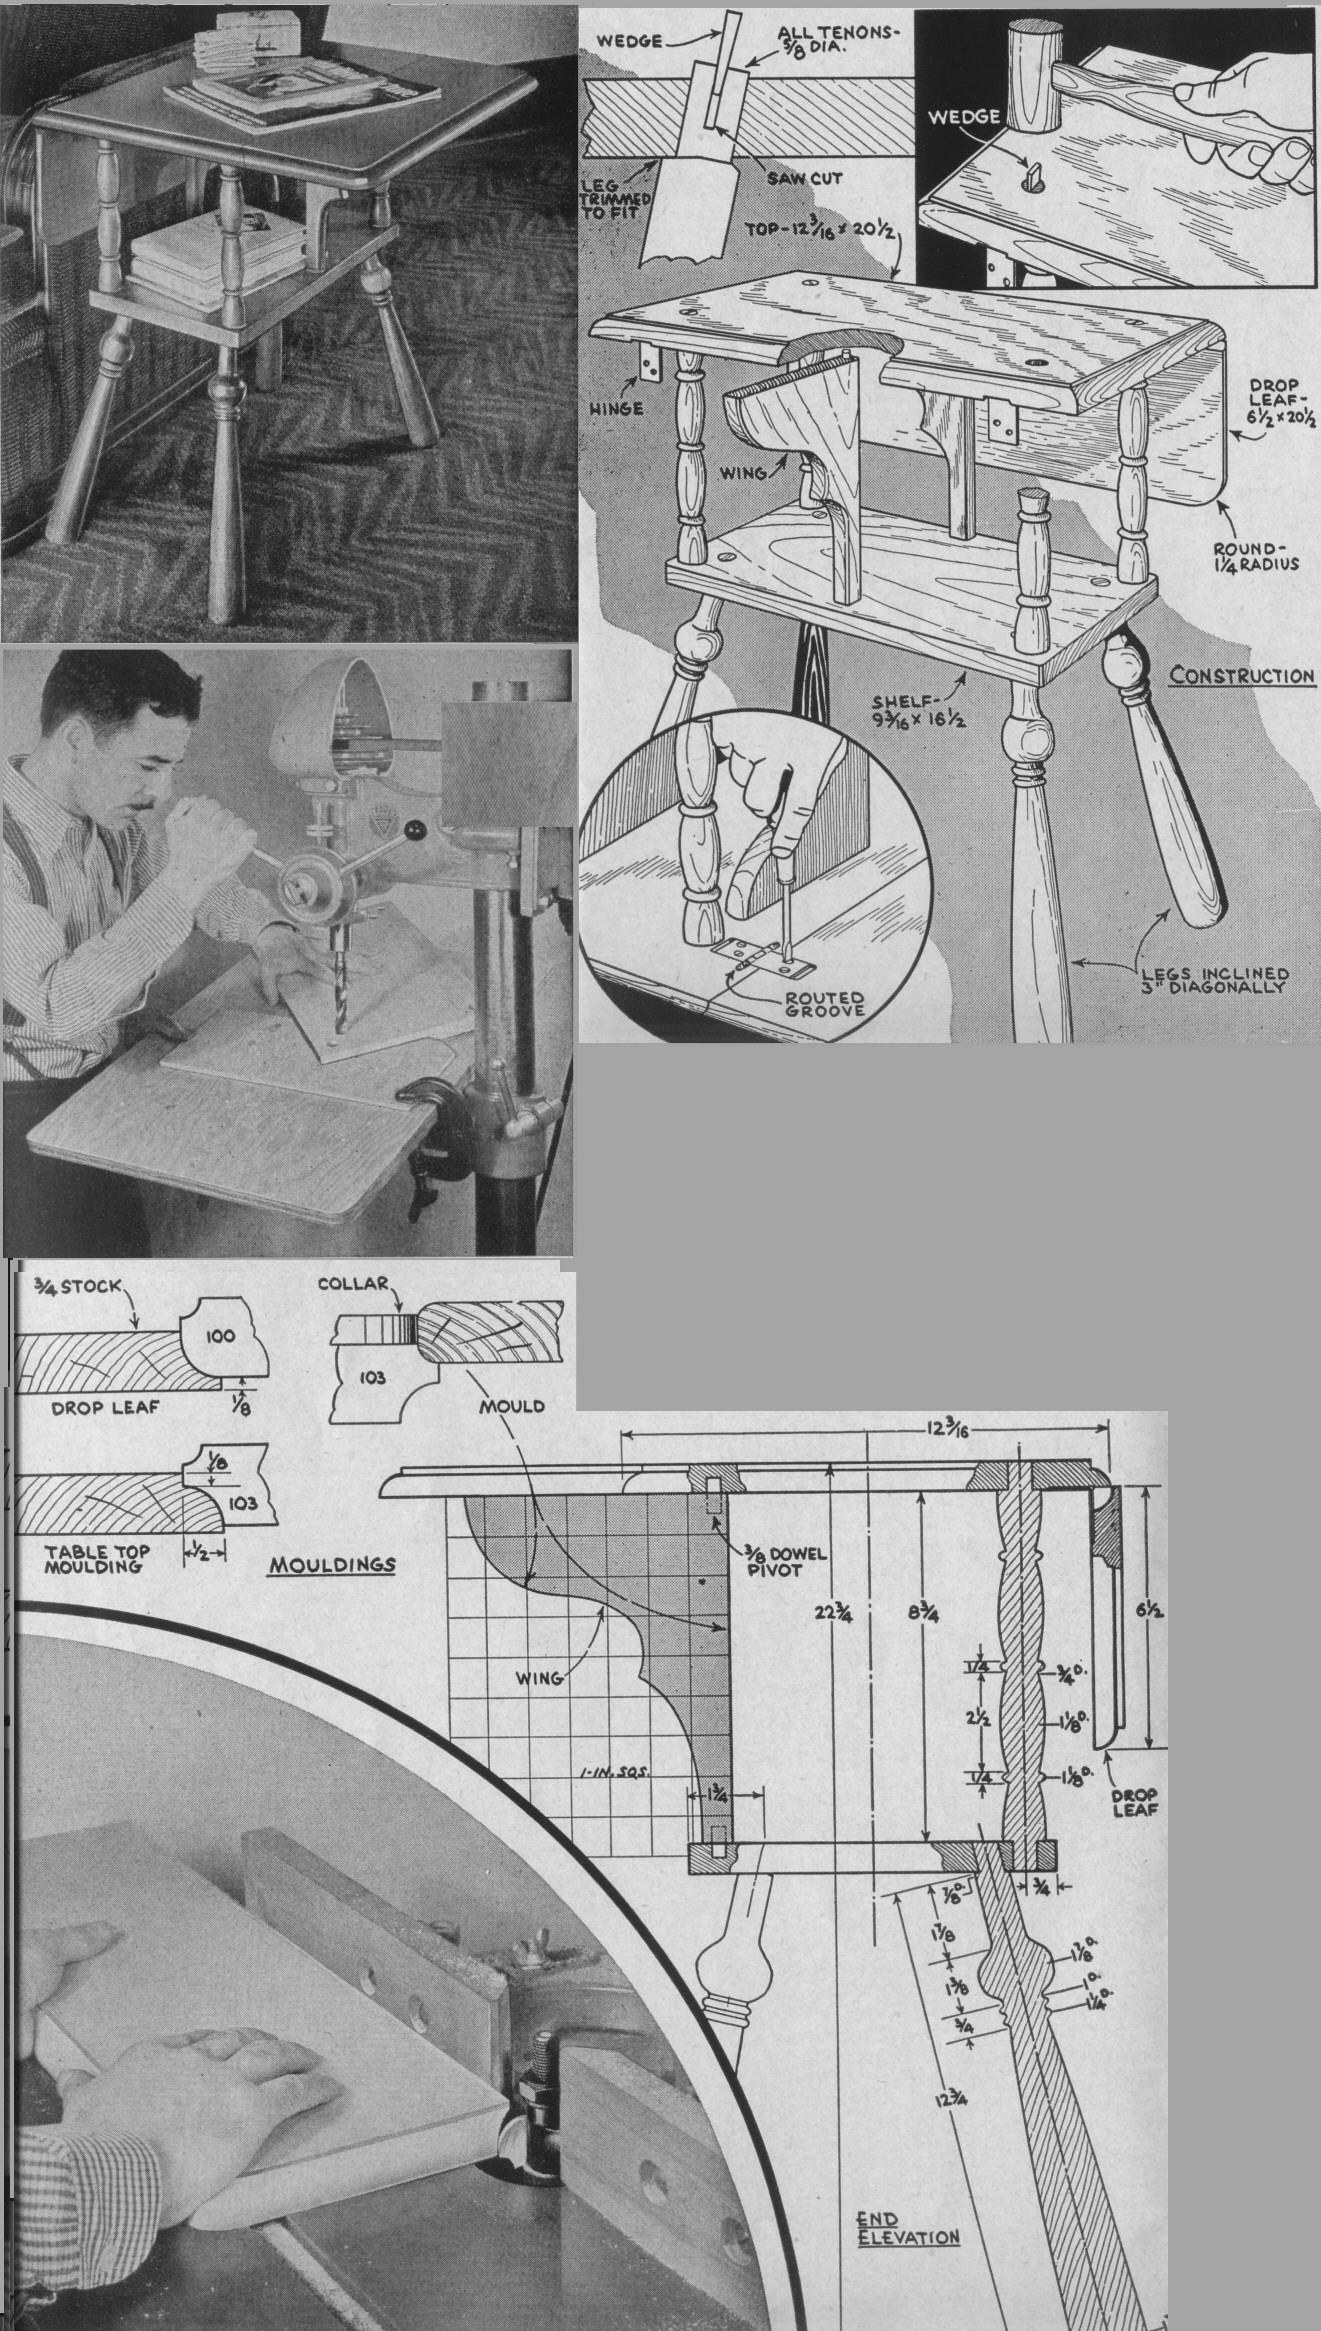
EARLY New Englanders adopted the drop leaf table in an effort to make their furniture less cumbersome. The wing supports gradually took on a faint resemblance to the graceful wings of a butterfly, and from this basic form of construction came scores of modifications in small tables. The one shown here is simplicity itself, yet attractive and at home in almost any setting.
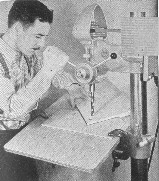
As can be seen in the drawings, the lower part of the table is essentially a cricket stool. Each of the four legs is inclined a distance of about 3 in., the inclination being exactly diagonal from the comers. A simple method of drilling the holes for the leg tenons is shown in the upper photo on this page. A vee-block is necessary. This is clamped to the |
|
 |
wood drill press table so that the point of the vee is in line with the drill. The table is tilted as required. Holes drilled with this set-up will be on an equal angle in relation to the side and end of the work.Tenon holes in the shelf and top for the upright spindles are best drilled by fastening the two pieces together. Then, with the layout made on the underside of the shelf, the holes can be bored right through the top in the same operation, insuring perfect accuracy. Holes for the dowel wing pivots can be drilled at the same time, but the drill should not go completely through the top. |
| |
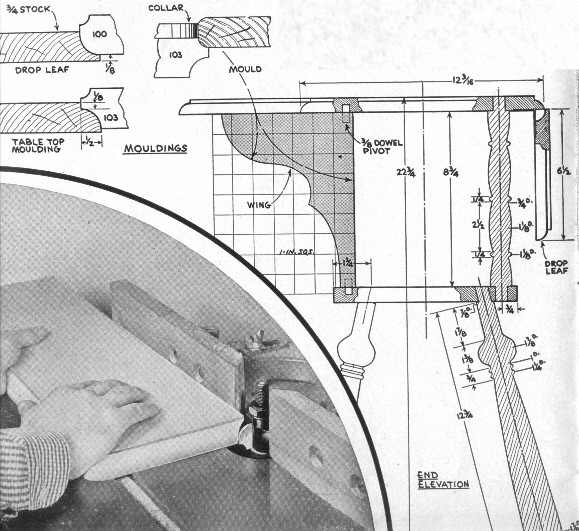
A rule joint moulding is run in around the edge of the top. This mould also forms one side of the rule joint. The hinges used have one short and one long leaf, the pin being located in a routed groove 1/2 in. in from the edge of the top. As shown, the body of the hinge is set flush. The joint will work equally well, however, if the hinges are fitted directly to the surface of the wood, without gains.
Typical of early American construction, all of the turnings are fitted in place with wedged tenons. The tenons should be left sufficientlylong to allow trimming A saw cut is run in exactly in the center of the tenon. After the spindles have been fitted in place, each joint is made secure by driving in a small wedge, as shown in the drawing. The wedges should be 5/8 in. wide (the same as the diameter of the tenons) and should be correctly tapered to wedge the tenon |
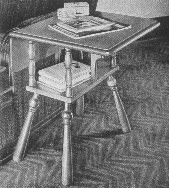
Simple to build, this little table retains
the grace and charm of early American
furniture. |
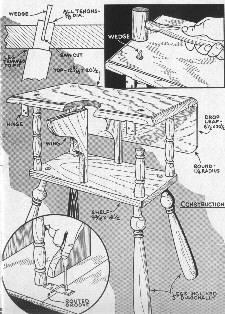 |
securely. All surplus wood is cut off and the joint sanded flush with the surface of the wood. All wedges should be at an approximate right angle with the grain of the top.
The wings are cut from 3/4 in. stock, and are shaped according to the squared diagram shown on the opposite page. 3/8 in. dowel pins are used as pivots, these being a tight fit in the wings and a swing fit in the top and shelf. Rubber tacks can be used to stop the swing of the wings at the right position.
The wood used for this piece should be maple. It should be stained to a good even color, light or fairly dark as desired. For the finish, three or four coats of thin orange shellac can be used. The final coat is rubbed down with pumice and linseed oil, after which a final Polish of wax, colored with a small amount of burnt umber, is applied. |
|
|
| * * * * Click on the picture above to download a higher resolution picture. * * * * |
*********** WARNING***********
Read my page on safety before building this item.
|