| TheWoodcrafter.net |
 Copyright © 2004. |
| My Basic Projects |
| The Retro Section |
| Jr. Woodcrafter |
| My Work |
| Detailed Plans |
| About |
| Lathe Work |
| Safety |
| Hints |
| Pic Gallery |
| Links |
| Search |
| Home |
| Birdhouses |
| Guest Book |
| Contact Us |
|
|
||||||||
|
Build this
Metal & Plastic Candleholder set
Here is the original article straight
from
Book No. 4514, PRACTICAL DELTA PROJECTS
NEW & NOVEL THINGS TO MAKE,
BOOK 14
DELTA MFG. DIVISION
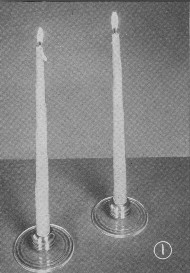    |
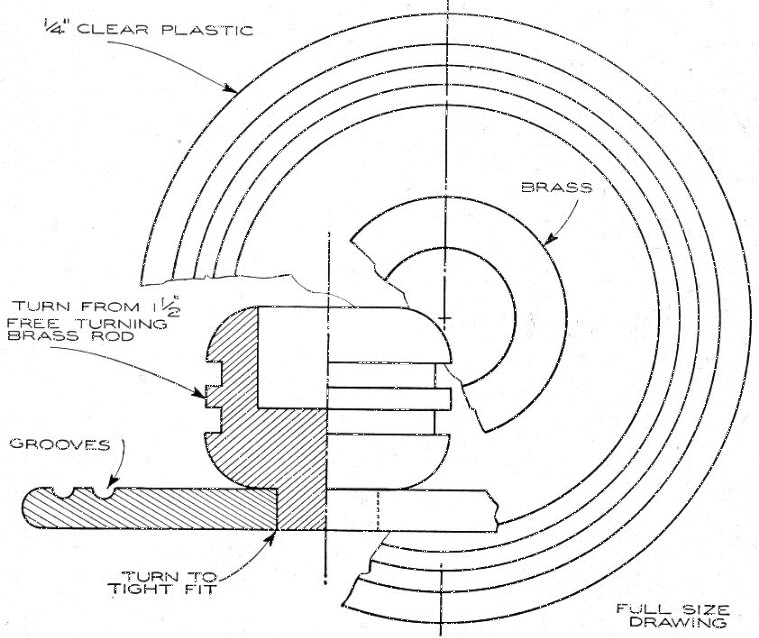
HERE is an attractive pair of
candle sticks which you can turn with the new
carbide tipped turning chisels. The finished
products are shown in Photograph No. 1. The
plastic base is turned from 1/4" clear
Plexiglas, while the cup itself is turned from
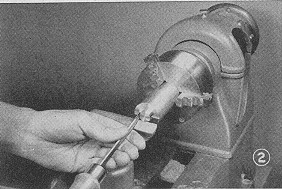
1-1/2" free turning brass rod. Photograph
No. 2 shows the brass rod chucked in the lathe,
using the 3-jaw self-centering chuck. The bottom
of the candle cup is turned first. (See full-size
drawing on the following page) After turning this
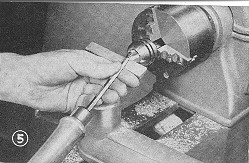
bottom step, the bowl itself is turned round as
shown in Photograph No. 3. The round nose carbide
tipped turning chisel is used for this operation.
This chisel is used free-hand as described in the
announcement enclosed with your last Deltagram.
The tip of the chisel is pivoted or rolled back
and forth to get a good, clean cutting action. |
||
|
|||

| * * * * Click on the picture above to download a higher resolution picture. * * * * |
*********** WARNING***********
Read my page on safety
before building this item.