|

|
|
The Woodcrafter Page© 2004 - all rights reserved.
|
|
|
|
|
|
Tool Caddy
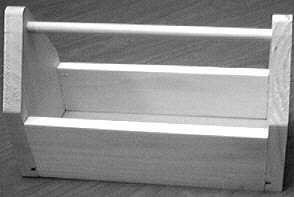
The actual item finished by my
son. |
This is a very simple project
when pre-cut pieces are used. The
handle is made from a 1/2"
dowel, the bottom from 1/4"
masonite board, and the rest from
3/4" pine planking scraps. |
|
 |
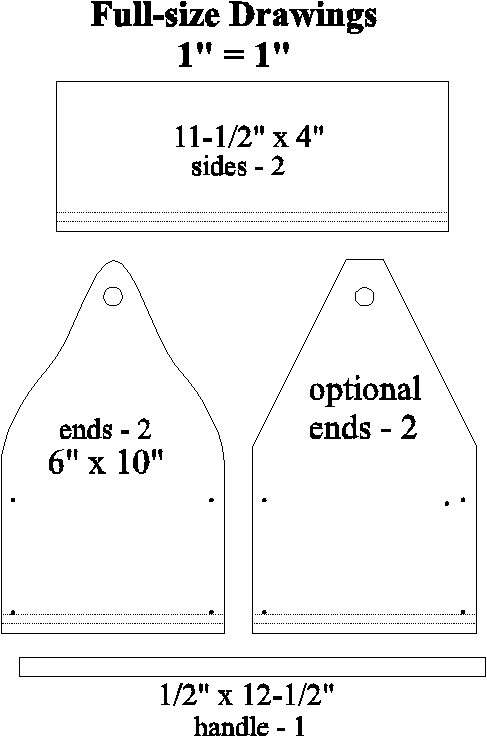
Use the diagrams to cut
out all pieces to the specified sizes.
Using a router, radial arm saw, or table
saw; cut a 1/4" wide - 1/4"
deep groove into the inner sides of both
sides and both ends 1/4" from the
bottom edges. Drill the 1/2" deep
1/2" diameter holes into the inner
side of both ends near the top as shown
in the drawings.
Now all your Junior Woodcrafter needs is
these six parts, ten 1-1/2 finishing
nails (two for spares),
a hammer, some wood glue, one sheet of
150 grit sandpaper, a really cool
workshop apron small enough for kids, and
safety goggles. |
 |
Assembly.
A. Drive four finishing nails into each
end piece where the black dots on the
drawings indicate.
B. Drive the nails to the point they are
about to go completely through or 'ever
so slightly through' the wood.
C. Apply glue to the end of one side
piece and position it against one end
being sure the grooves in both face
inside and align with each other.
D. Hammer the two nails all the way in.
E. Apply glue to the opposite end of the
other side piece and position it against
the same end again being sure the grooves
face inside and align with each other.
F. Hammer these two nails all the way in.
G. Slide the bottom into the groove in
the sides and the end.
H. Apply glue to the exposed ends of the
two side pieces and position the last end
piece against the sides with the bottom
piece fitting into the groove.
I. Slip the handle into the holes but do
not glue it. You will need to open the
top a little to insert it.
J. Hammer the last four nails all the way
in.
K. Sand off all sharp corners.
J. Allow the glue to dry well before use. |
|
| *
* * * Click on the picture above to
download a higher resolution picture. * * * * |
*********** WARNING***********
Read my page on safety
before building this item.
|
