| TheWoodcrafter.net |
 Copyright © 2004. |
| My Basic Projects |
| The Retro Section |
| Jr. Woodcrafter |
| My Work |
| Detailed Plans |
| About |
| Lathe Work |
| Safety |
| Hints |
| Pic Gallery |
| Links |
| Search |
| Home |
| Birdhouses |
| Guest Book |
| Contact Us |
|
|
||||||||
|
Childern's Playhouse
Here is the original article from the
March - April 1959 Deltagram
ROCKWELL MANUFACTURING COMPANY - A DELTACRAFT PULICATION
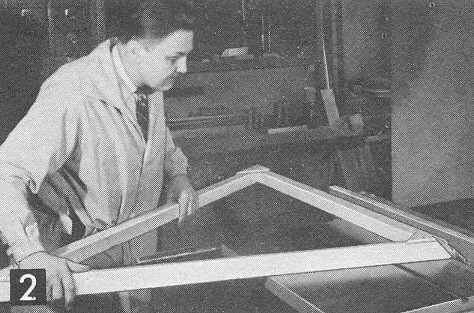
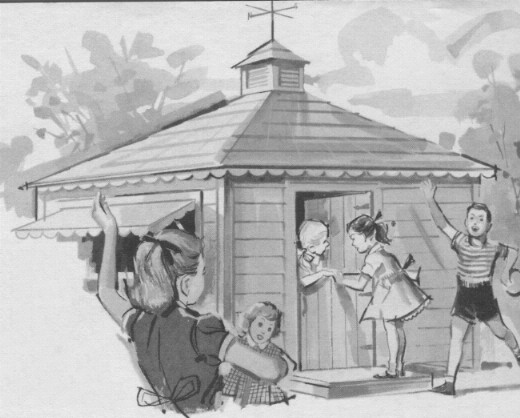 Rain or shine ... they'll enjoy playing in this roomy (36 sq. ft. of floor space) playhouse that also serves as a convenient toy storage room. Boys will use it as a "fort", a club house, or as a bunk house for "sleeping out" ...girls will use it to "play house" and for "tea parties" and other pretend games. Dad can also use it for garden tool storage during the winter months. The cleats to strengthen the plywood wall sections of the playhouse are made of 2 x 4 stock ripped in half making 1-5/8 x l-5/8 square stock. Full 2 x 4 base plates are fastened to the ¼" waterproof plywood wall sections on end as shown in Fig. 1. Use cement or rosin coated 4D common nails for fastening the waterproof plywood panels to the 2 x 2 uprights as well as the top and bottom pieces. Fasten cleats over the panel joints for strength and neat appearance. Make necessary cut-outs for doors and windows on the wall sections. Nail the outside trim and the hardboard siding (if desired) with the sections lying flat on the floor. Assemble the wall sections as shown in Fig. 1A. Notice that only 4 corner cleats are required. If flooring is desired, use 2 x 4 joists spaced approximately 24" apart and lay plywood or flooring stock. For an economi- cal floor, lay common lumber and cover with linoleum. The hip roof is made in four sections. Each section is made of ¼" plywood nailed to 2 x 2 cleats with standard wood shingles or composition roofing paper fastened to the plywood. Should you decide on a cupola, for which plans appeared in the May-June 1958 "Deltagram," or other means of ventilation, the roof sections will have to be made with a blunt end as shown in Fig. 5. For a regular hip roof the sections come to a point as shown in Photo No. 2. Overall roof section dimensions and angle cuts are given in Fig. 5A. The edges on the tapered sides of each roof section are bevel cut for good fitting joints. To make these bevel cuts, assemble all 4 roof sections with the plywood pieces cut only to general shape. Then set the blade or arbor at 19 degrees and make the side bevel cuts on the side frame pieces and plywood tops simultaneously. Doors are made in two same size parts to simulate Dutch doors. 1 x 6" (¾ x 5½") solid stock with chamfered edges can be used for the door fronts. ¼" fir exterior plywood with V-notches cut about 5½" apart can also be used. The V-notches are made on the circular saw with flute bead cutters No. 35-228 mounted in a No. 265 moulding cutterhead, see Photo No. 3. In either case brace pieces made of ¾" by 2" wide stock are nailed in place as indicated in Fig. 6. Butt hinges with ornamental hinge plates and a complete dutch door hardware set make up the hardware needed for the doors. Should you decide to use a step be sure to allow for the overall step height, (4¾") Fig. 7, when cutting out the opening for the doors. |
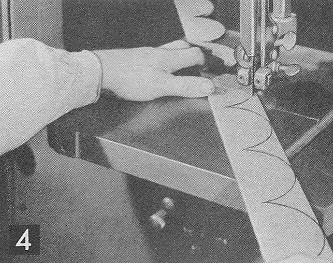
The awning should be made to swing on hinges so as to serve as a cover for the counter opening when closed. The valance around the awning is made of ¼" exterior plywood scalloped on the scroll saw or band saw, Photo No. 4. Notice that the valance attaches to the awning frame so that it sets back approximately 2 inches from the edge. In place of the awning support brackets, two 4¾" dowels can be used as awning supports with holes drilled in the counter and frame to accommodate them. The same type of trim with larger scallops is used around the roof edge. These are fastened to cleats as indicated in Fig. 4. The counter top is notched to fit the opening and is cut from ¾ x 8" stock. Apply a coating of wood perservative over all parts except the wood shingles before painting. Paint with an outside paint with colors of your choice. Set house on bricks or blocks to keep house above ground level.
|

Right-click here to download the plans as an Adobe Acrobat (pdf) file. |
| * * * * Click on the drawings above to download a higher resolution picture. * * * * |
*********** WARNING***********
Read my page on safety before building this item.